Godot: Single Level 2D Platformer (Part 1)
In this guide you will build a single level 2Dplatform game from scratch including the following components:
-
Player
-
Player Controls / Movement
-
Level / Platforms
-
Spawn Points
-
Main Menu
-
Win Screen
-
Timer
-
Item Pick Up
-
Score
-
Obstacle
-
Enemy
-
Audio
This guide will be broken down into multiple parts.
Part 1 will cover:
-
Installing and setting up Godot
-
Creating Scenes
-
Introduction to Nodes
-
Creating a platform
-
Creating a Player object
-
Introduction to scripting
-
Player Movement
-
Handling player input using the Input Map
-
Gravity
We start with a 2D game so that we can focus on key game design and development elements
This guide has been built using Godot 3.5.1 Standard on Windows. Godot is available on most platforms.
Godot also has excellent documentation which can be found here.
For this project we will use assets from kenne.nl
We will use the pixel platformer pack which can be downloaded here.

kenney.nl
Installing and running Godot
Go to Godotengine.org/download
Download the editor.

Godot does not require much space.
Extract the file to a folder of your choice.
Run the executable.

Creating a project
Click New Project to create a project.

Give your project a suitable name and choose a folder to save your project in (this should also be part of a Github repository if you are going to use version control.
You will also need to click Create Folder to make the project folder.
OpenGL refers to the graphics rendering tools that you are going to use. OpenGL ES 3.0 is suitable for most programs except web / broswer based games.

When you are ready click Create & Edit.

About the Editor
When the editor first loads it is in a 3D view. Click the 2D button at the top of the screen.

All of the object that you see on the screen are made up of Nodes. These can be players, platforms, parts of the physics engine, images, etc.
The inspector on the right of the screen shows the properties of the currently selected node.
Using the mouse wheel will zoom in and out.
There are also Scenes which can contain an entire level or be a collection of object that could be reused.
For example you could have a Scene for the player and this scene will contain everything that is to do with the player such asnodes, scripts (code), images, models, audio, etc.
We can select what type of Scene we will have when we create a new Scene and select the root node.
A root node is the parent or top level node in a scene.

Asset and File Management
It is really important to have a consistent and logical structure for you files, scenes and nodes.
This includes giving them sensible names and grouping them accordingly.
When adding files you can place them in the project
First we will create folders for our assets and scripts by right clicking in the FileSystem panel and selecting New Folder.

Inside the Assets folder make two more folders images and audio
If you haven't already download the Pixel Platformer pack from kenney.nl here.
Extract the folder into the images folder.
You can quickly get to the file manger by right clicking in the FileSystem panel and selecting Open in File Manager.


When you return to the Godot editor you will see that the files have been imported to the project.

Once you have added files to Godot ONLY move then using the FileSystem panel as moving them using File Explorer or Finder might break the project.
You should also regularly backup and commit your files to Github (or other version control tool) to maintain the integrity of your project.
You don't want a situation similar to what Pixar had with Toy Story 2.
Now that we have a basic file structure and naming convention set up we will start to develop our game.
Creating a scene for the level
Select 2D Scene from the Scene panel in the top left.

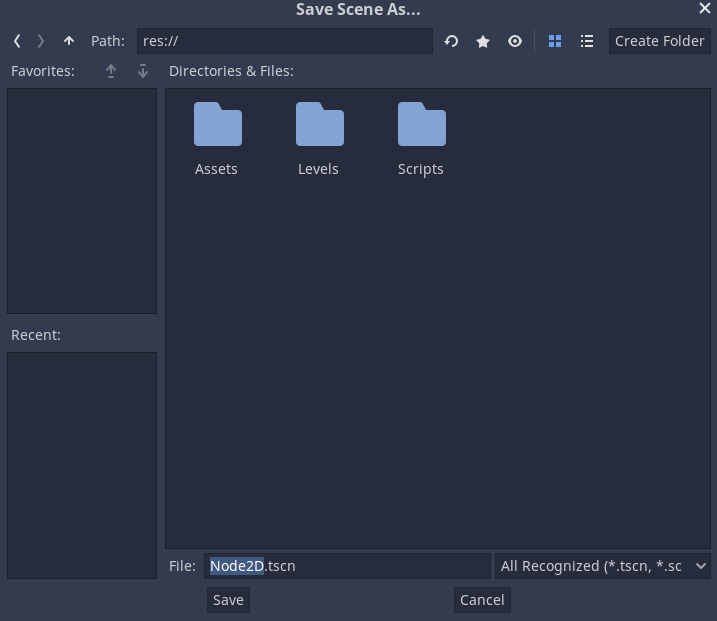
Save the scene, we should also create a folder to store our levels.
Save the scene as Level1.tscn
tscn is the Godot file extension for scenes.
Right click on the Node2d root node (or press F2) and rename it to the name of the scene (it can be different but this is a good practice)
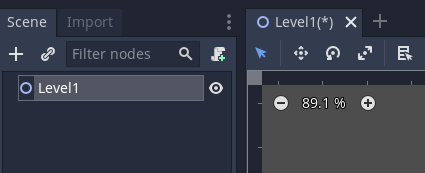
This scene will act as a container for the other parts of our game.
Creating the player
We need to develop a player avatar.
Create a new scene and set the Root node to Other Node
In the window that appears search for KinematicBody2D and then click create.
KinematicBody2D allows for Godot to use the 2D physics engine on this node.

Rename the node to Player and save the scene as Player.
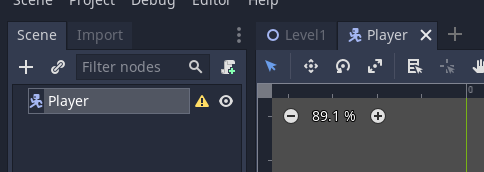
Note there is a yellow triangle next to the Player node. This is because the KinematicBody2D hasn't been properly configured yet.
If we click it we get this message.
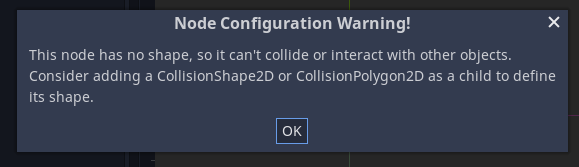
We need to add a collision object to handle this node colliding with other nodes.
Right click on the Player node and select Add Child Node.
Search for and add a CollisionShape2D node.
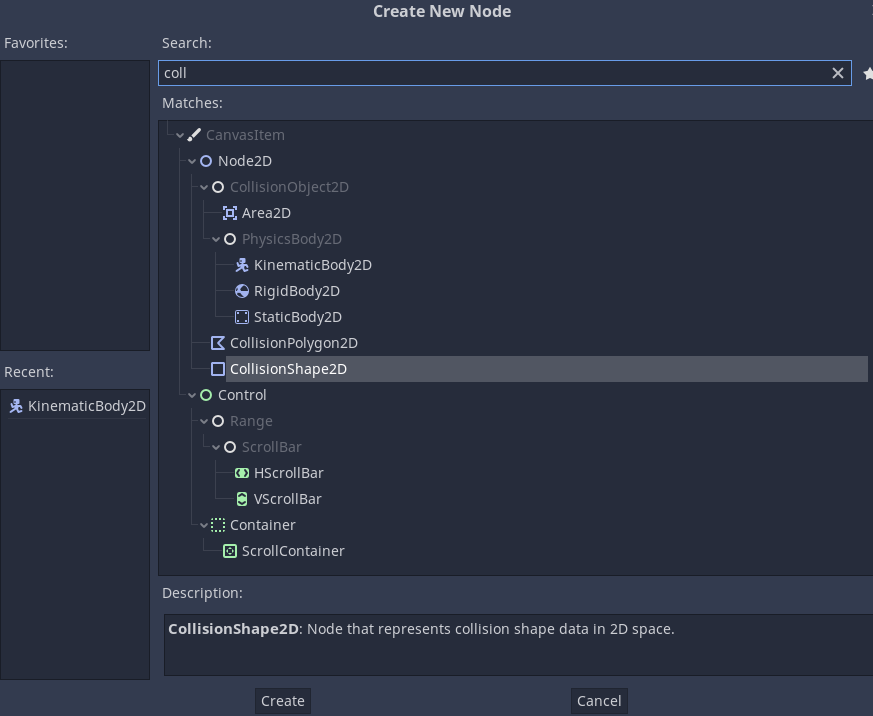
We still have an error, this time on the CollisionShape2D. This is because we haven't set the area for the collision yet.
Next we will add a sprite for our player.
Right click on the Player node and select Add Child Node.
Search for and add Sprite.

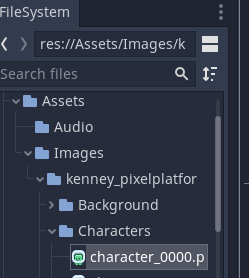
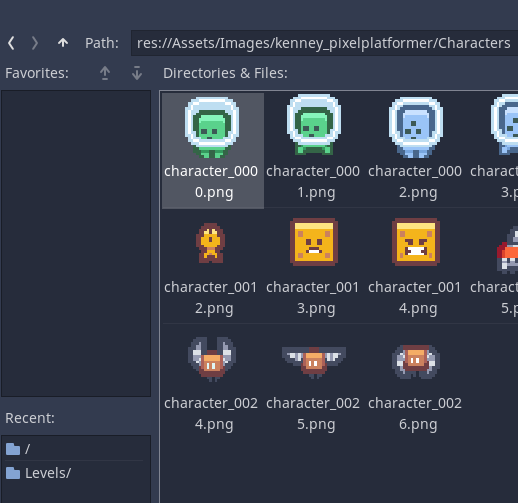
I nthe FileSystem go into the kenney asset pack and the characters folder.
Select a character to use. In this example I have selected character_0000.png
With the sprite node selected drag the image onto the Texture area of the inspector as shown below.
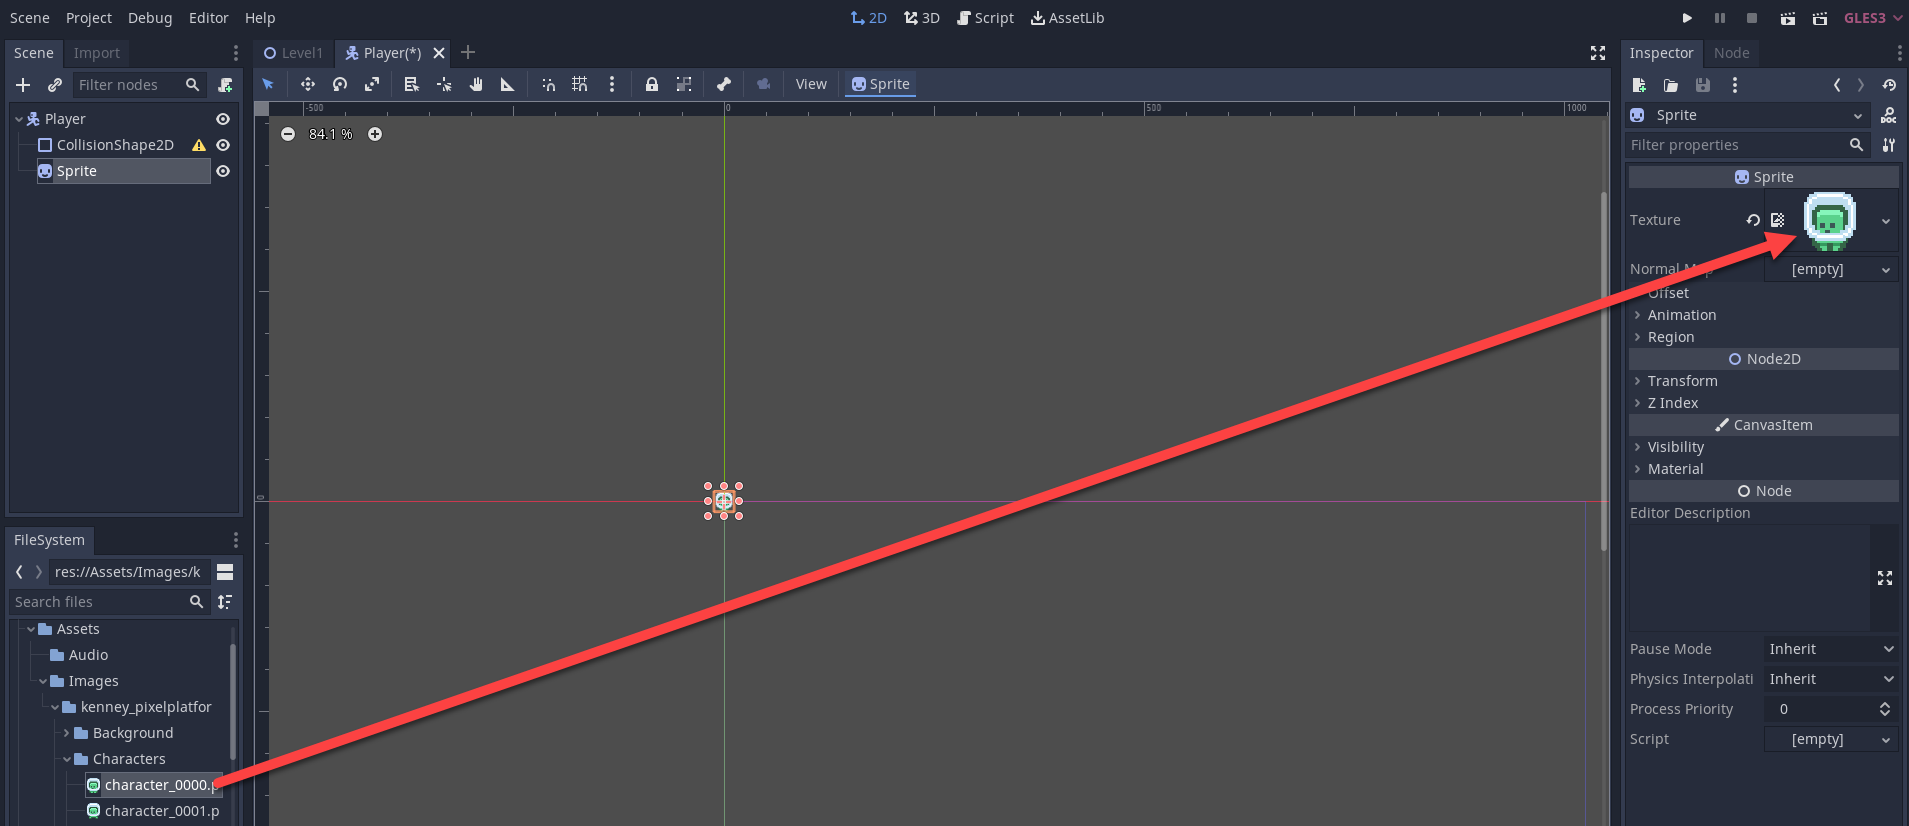
You should now see your player on the screen.
You can also just drag the image onto the scene.
To move our sprite when the sprite node is selected open the Transform drop down in the inspector.
We can then position it. Make sure that x and y for position are set to 0.

Now that we have our player sprite we want to setup collision detection.
Zoom in on the sprite using the mouse wheel.
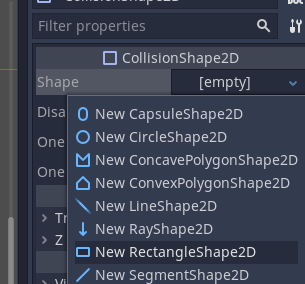
Select the CollisionShape2D node.
In the Shape section select NewCapsuleShape2D
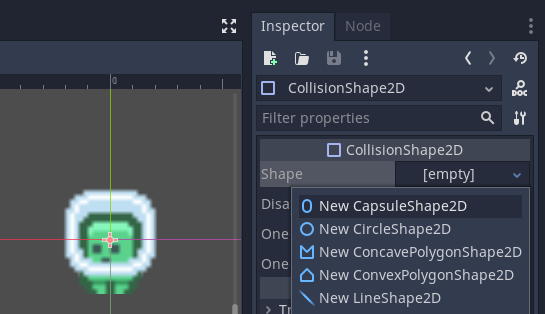
We now have a collision shape.
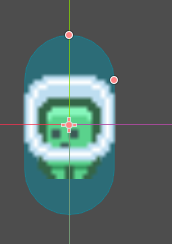
We now need to modify it so that it is the shape of our player (or the area we want to detect collisions with.
There are the orange handles which can be used to adjust the shape.
To make it easier move the sprite node above the CollisionShape2D node in the Scene explorer. This allows us to see the collision area more clearly (what is at the top of the tree is displayed first with items lower in the list displayed overtop of higher items)
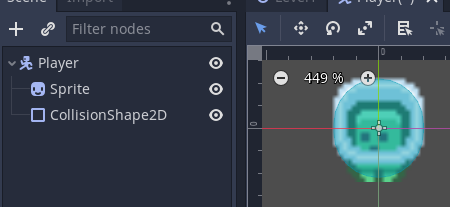
We now have our player created (no movement yet).
Save the Player scene and switch back to Level1.
Drag the player scene from the FileSystem onto the Level1 scene.
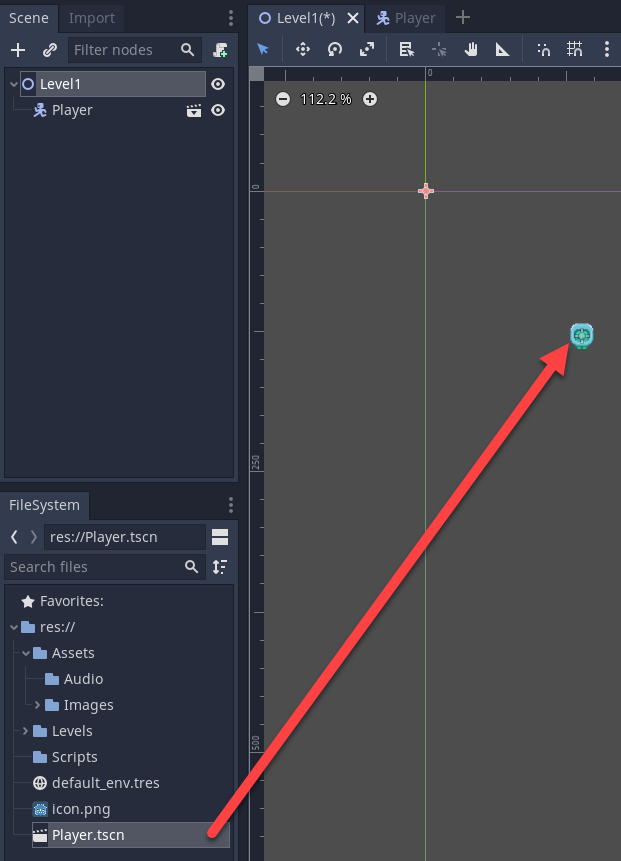
Save the scene.
Configuring and running the game
Go to Project > Project Settings...
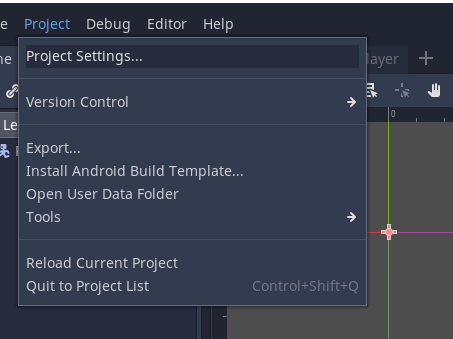
Here we can configure global settings for our project / game.

Click on the folder next to Icon to change the default game icon from the Godot logo.
Select an image to use.
The location will update.

We need to set a default scene to run first.
This will usually be a loading scene or main menu in a final game.
Here we will set Level1 to load on run.
Click Run in the tree on the left on the General Tab.
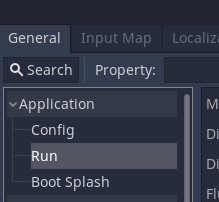
Click the folder next to Main Scene and select Level1.


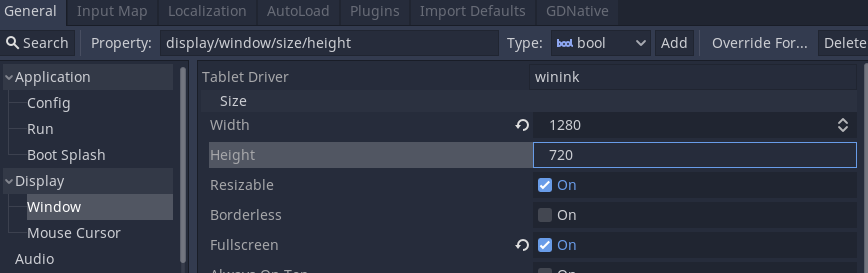
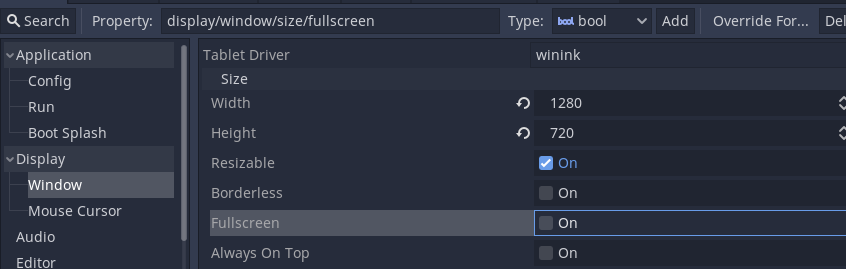
We can also customise the display window here by going to General > Display > Window
We then can adjust the Window settings. Lets make our game fullscreen but 720p by setting width to 1280, height to 720 and fullscreen to on.
There are a lot of option here but we won't worry about these at this point.
Click Close.
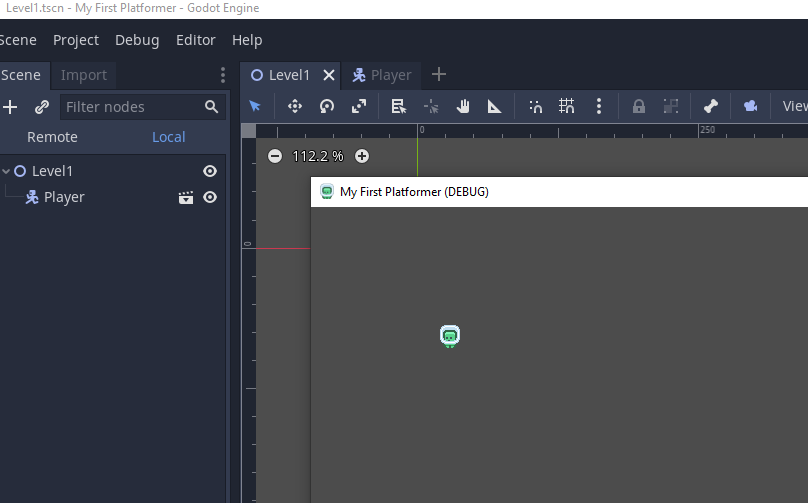
I nthe top right corner we can click the play button or press F5 to play the game.

Alternatively to play just this scene we can press F6.
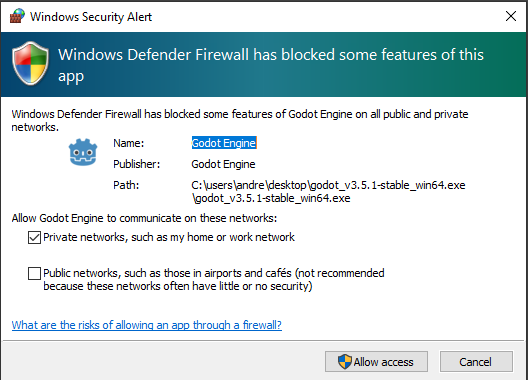
When you run the project for the first time you might get Windows Firewall asking for permissions. Allow this.
You should now see the game running.

Fullscreen can be annoying for development so we will turn it off for now.
Scripting (coding) the player
We want our player to move and to follow the rules of gravity.
To achieve this we need to add a script.
Scripts are pieces of code that are attached to nodes to carry out tasks.
First we will add gravity to our player and then set up player input and movement.
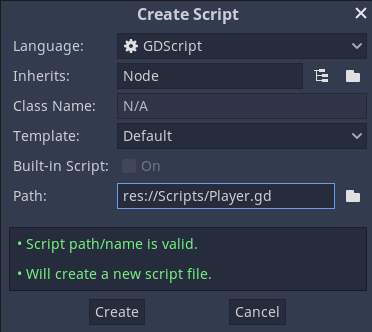
Right click on the Scripts folder and select New Script...
Name the file Player.gd
We will use GD script (the Godot default).
For now we will leave inherits to be Node. Changing this will allow us to use some additional features of object orientated programming.
Drag the script onto the Player node.
We can see it is attached to the Player node as there is a scroll icon next to it.

Double click the script to open it.
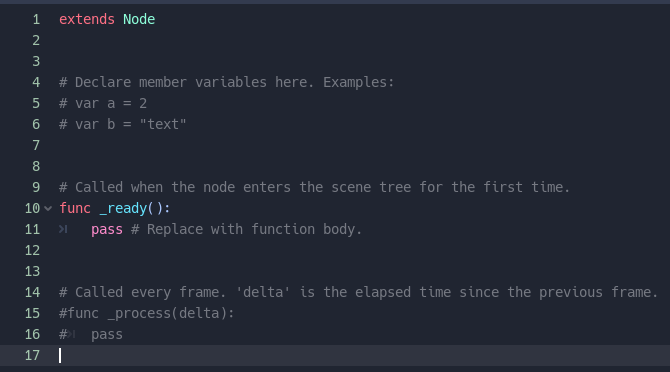
Add the code shown below, take careful note of the numbered comments to explain each section of code.
# 1 Extend the kinematic body node to allow for 2d physics
extends KinematicBody2D

# 2 Create a gravity variable of type int and set it to 800
# In capitals as it is a constant and won't change
var GRAVITY : int = 800

# 3 Create a variable to store the player velocity
# Set this to the type of a 2D vector e.g. x and y
var velocity: Vector2 = Vector2()

# 4 Create a sprite variable and link it to the sprite node. When the node is
# initialised.
onready var sprite = $Sprite

# Called when the node enters the scene tree for the first time.
func _ready():
	pass # Replace with function body.


# 5 Runs the physics updates to the game
func _physics_process(delta):
	# 6 Update the y axis velocity by the time elapsed
	velocity.y += delta * GRAVITY

	# 7 Create a variable for motion and update it each time the function is
	# called
	var motion = velocity * delta
	# 8 Call the move_and_collide funcion which moves the object
# warning-ignore:return_value_discarded
	move_and_collide(motion)
Save the script and run the game.
You should see the player character falling down.

Creating a simple platform
For more complex levels you should use tilemaps Godot see the official documentation here. This example will use a simple sprite.
To create a platform we will create a new scene and set the root node to be a StaticBody2D node..
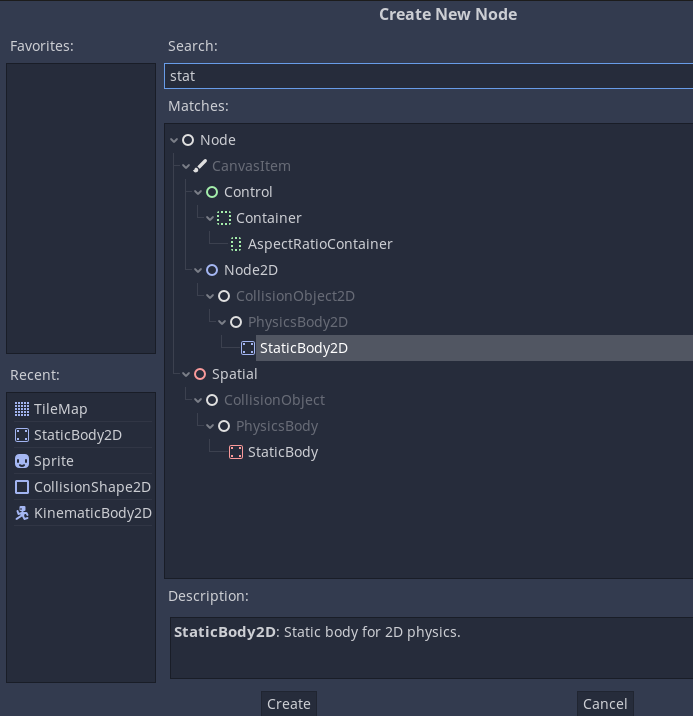
Save the scene as platform.
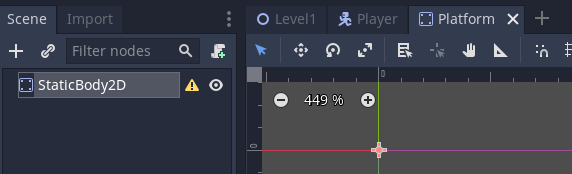
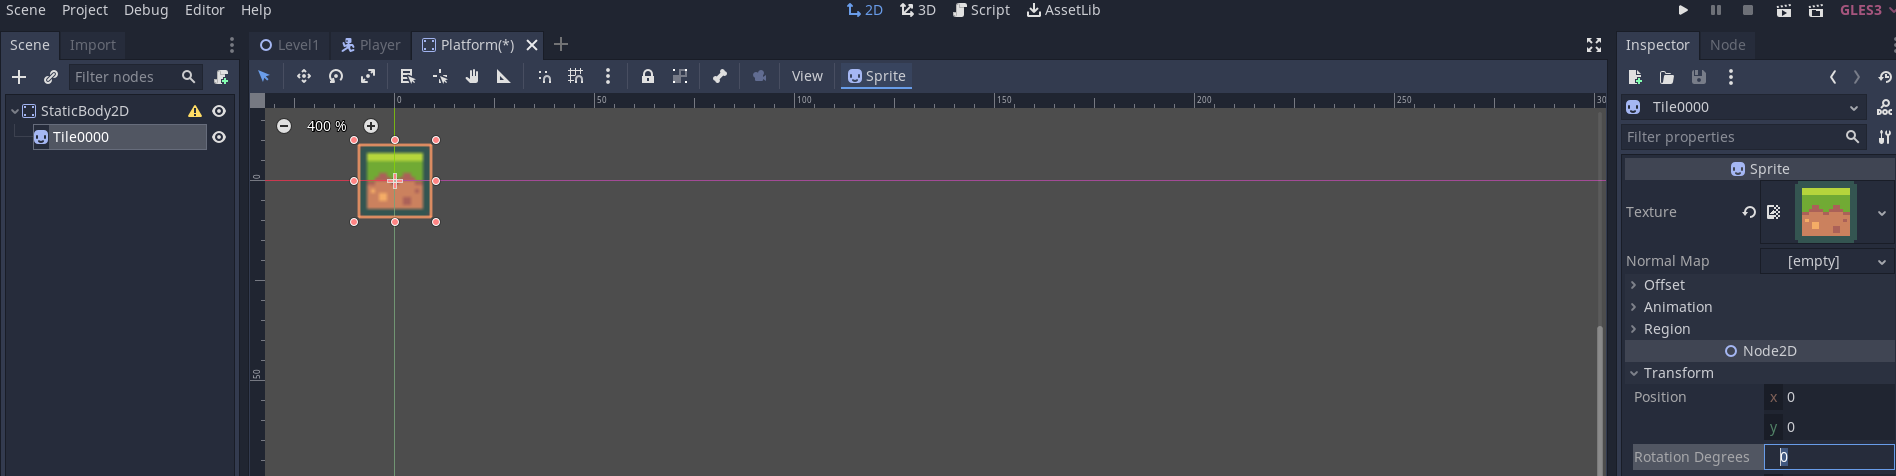
Add a sprite to the platform.
Position the sprite
Add a CollisionShape2D node to the StaticBody.
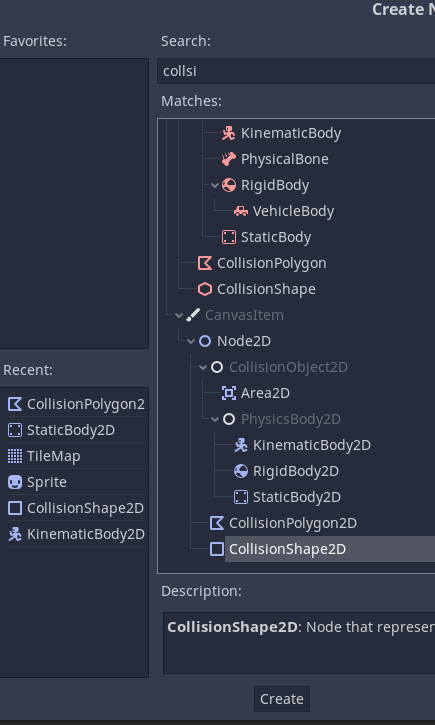
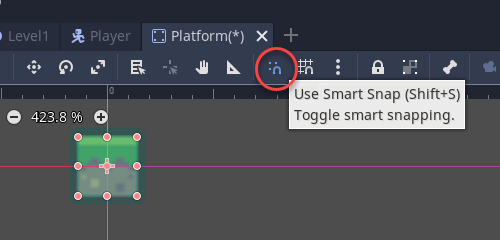
Set the collision shape to be Square and resize it to fir the sprite.
You can use the smart snapping tool to help you get the correct size.
Save the Platform scene.
Go back to Level1 and add in the Platform scene.

When you run the game the player should stop when they collide with a platform.

We can also use the scale tool to resize the platform.

Remember this is not the best way to manage level design, you should use tilemaps.
Note that any change we make to the Platform (or any other scene) automatically updates all instances (uses) of the scene.
Player movement
Now we have a platform we want to add player controls and scripting to be able to move out player left and right and jump.
Open the Player scene and Player script
We can switch between 2D mode and scripts using the buttons at the top of the editor.

First we need to go into the project settings and add input bindings for the player.
Go to Project > Project Settings...

Click on the Input Map tab. This is where we can add actions for handling input.

We can use this for keyboard, controller, and touch input.
First we add an action to the input map.
We will work through adding an action for moving left.
Note that these actions are for the entire project / game not just a scene. Although we can write different scripts to get different actions to be carried out.
Name the action player_lleft

Now add actions for right and jump.

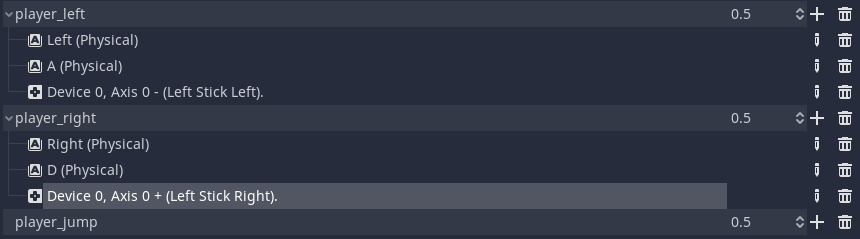
Now we need to add event handlers to each action to detect what button press we are going to listen for.
Click the plus to the side of player_left
![]()
Select physical key.

Press the key to move the player left e.g. left or a.


We will also add a controller input.
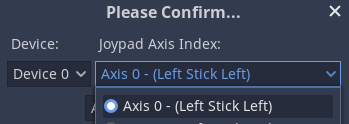
Click the + and select joy axis.

Select the input direction that you want.
Do the same for the player_right action.
Now we need to handle the player_jump action.
Add in the controls for this.

Close the Project Settings.
Go to the Player.gd
Edit the player script so that it contains the content below. Note that the numbered points are not in order in the file. They are in the order that the code should be added to the Player.gd script.
# 1 Extend the kinematic body node to allow for 2d physics
extends KinematicBody2D

# 2 Create a gravity variable of type int and set it to 800
# In capitals as it is a constant and won't change
var GRAVITY : int = 80

# 3 Create a variable to store the player velocity
# Set this to the type of a 2D vector e.g. x and y
var velocity: Vector2 = Vector2()
# 7 Create a variable to set the speed of the player
var speed: int = 10

# 4 Create a sprite variable and link it to the sprite node. When the node is
# initialised.
onready var sprite = $Sprite

# Called when the node enters the scene tree for the first time.
func _ready():
	pass # Replace with function body.


# 5 Runs the physics updates to the game
func _physics_process(delta):
	# 6 Update the y axis velocity by the time elapsed
	velocity.y += delta * GRAVITY

	# 8 Check is the left input is pressed
	# note player_left is the action in the input map
	if Input.is_action_pressed("player_left"):
		# 9 Update the velocity by the speed of the palyer
		velocity.x -= speed
	# 10 do the same for the moving right
	elif Input.is_action_pressed("player_right"):
		velocity.x += speed
	# 11 If left or right is not pressed set the x velocity to 0
	else:
		velocity.x = 0

	# 12 Flip the sprite depending on the direction of movement
	if velocity.x < 0:
		sprite.flip_h = false
	elif velocity.x > 0:
		sprite.flip_h = true


	# 13 Move the object, the second parameter sets the vertical axis
	move_and_slide(velocity, Vector2.UP)
Now we need to add code to handle the jump actions.
Make the following changes to the Player.gd as shown below.
# 1 Extend the kinematic body node to allow for 2d physics
extends KinematicBody2D

# 2 Create a gravity variable of type int and set it to 800
# In capitals as it is a constant and won't change
var GRAVITY : int = 80

# 3 Create a variable to store the player velocity
# Set this to the type of a 2D vector e.g. x and y
var velocity: Vector2 = Vector2()
# 7 Create a variable to set the speed of the player
var speed : int = 5
# 14 Jump force
var jump : int = 50

# 4 Create a sprite variable and link it to the sprite node. When the node is
# initialised.
onready var sprite = $Sprite

# Called when the node enters the scene tree for the first time.
func _ready():
	pass # Replace with function body.


# 5 Runs the physics updates to the game
func _physics_process(delta):
	# 6 Update the y axis velocity by the time elapsed
	velocity.y += delta * GRAVITY

	# 8 Check is the left input is pressed
	# note player_left is the action in the input map
	if Input.is_action_pressed("player_left"):
		# 9 Update the velocity by the speed of the palyer
		velocity.x -= speed
	# 10 do the same for the moving right
	elif Input.is_action_pressed("player_right"):
		velocity.x += speed
	# 11 If left or right is not pressed set the x velocity to 0
	else:
		velocity.x = 0

	# 12 Flip the sprite depending on the direction of movement
	if velocity.x < 0:
		sprite.flip_h = false
	elif velocity.x > 0:
		sprite.flip_h = true

	# 15 Detect the jump button being pressed
	if Input.is_action_pressed("player_jump"):
		# 16 Multiply by -1 to turn the velocity into a negative value
		velocity.y = jump * -1


	# 13 Move the object, the second parameter sets the vertical axis
	move_and_slide(velocity, Vector2.UP)
Note that we can currently spam the jump button.
We need to check to see if we are touching the floor / ground.
# 1 Extend the kinematic body node to allow for 2d physics
extends KinematicBody2D

# 2 Create a gravity variable of type int and set it to 800
# In capitals as it is a constant and won't change
var GRAVITY : int = 80

# 3 Create a variable to store the player velocity
# Set this to the type of a 2D vector e.g. x and y
var velocity: Vector2 = Vector2()
# 7 Create a variable to set the speed of the player
var speed : int = 5
# 14 Jump force
var jump : int = 50

# 4 Create a sprite variable and link it to the sprite node. When the node is
# initialised.
onready var sprite = $Sprite

# Called when the node enters the scene tree for the first time.
func _ready():
	pass # Replace with function body.


# 5 Runs the physics updates to the game
func _physics_process(delta):
	# 6 Update the y axis velocity by the time elapsed
	velocity.y += delta * GRAVITY

	# 8 Check is the left input is pressed
	# note player_left is the action in the input map
	if Input.is_action_pressed("player_left"):
		# 9 Update the velocity by the speed of the palyer
		velocity.x -= speed
	# 10 do the same for the moving right
	elif Input.is_action_pressed("player_right"):
		velocity.x += speed
	# 11 If left or right is not pressed set the x velocity to 0
	else:
		velocity.x = 0

	# 12 Flip the sprite depending on the direction of movement
	if velocity.x < 0:
		sprite.flip_h = false
	elif velocity.x > 0:
		sprite.flip_h = true

	# 15 Detect the jump button being pressed
	# 17 Add the is_on_floor() check to the jump condition
	if Input.is_action_pressed("player_jump") && is_on_floor():
		# 16 Multiply by -1 to turn the velocity into a negative value
		velocity.y = jump * -1


	# 13 Move the object, the second parameter sets the vertical axis
	move_and_slide(velocity, Vector2.UP)
Now the player will still move left and right at increasing speed.
Make the changes at 18-20 in the code to set a fixed speed on the x axis.
# 1 Extend the kinematic body node to allow for 2d physics
extends KinematicBody2D

# 2 Create a gravity variable of type int and set it to 800
# In capitals as it is a constant and won't change
var GRAVITY : int = 80

# 3 Create a variable to store the player velocity
# Set this to the type of a 2D vector e.g. x and y
var velocity: Vector2 = Vector2()
# 7 Create a variable to set the speed of the player
# 20 Update the speed that the player moves
var speed : int = 50
# 14 Jump force
var jump : int = 50

# 4 Create a sprite variable and link it to the sprite node. When the node is
# initialised.
onready var sprite = $Sprite

# Called when the node enters the scene tree for the first time.
func _ready():
	pass # Replace with function body.


# 5 Runs the physics updates to the game
func _physics_process(delta):
	# 6 Update the y axis velocity by the time elapsed
	velocity.y += delta * GRAVITY

	# 8 Check is the left input is pressed
	# note player_left is the action in the input map
	if Input.is_action_pressed("player_left"):
		# 9 Update the velocity by the speed of the player
		# 18 set x velocity to -speed to have fixed speed
		velocity.x = -speed
	# 10 do the same for the moving right
	elif Input.is_action_pressed("player_right"):
		# 19 set x velocity to speed to have fixed speed
		velocity.x = speed
	# 11 If left or right is not pressed set the x velocity to 0
	else:
		velocity.x = 0

	# 12 Flip the sprite depending on the direction of movement
	if velocity.x < 0:
		sprite.flip_h = false
	elif velocity.x > 0:
		sprite.flip_h = true

	# 15 Detect the jump button being pressed
	# 17 Add the is_on_floor() check to the jump condition
	if Input.is_action_pressed("player_jump") && is_on_floor():
		# 16 Multiply by -1 to turn the velocity into a negative value
		velocity.y = jump * -1


	# 13 Move the object, the second parameter sets the vertical axis
	move_and_slide(velocity, Vector2.UP)