This tutorial continues form part 4 where we created an obstacle that kills a player.
Layers and Masks
In order to manage multiple collisions we need to customise the layers and masks.
In Godot a Layer is used to group similar items together. We use masks to determine what layers each object / node can interact with.
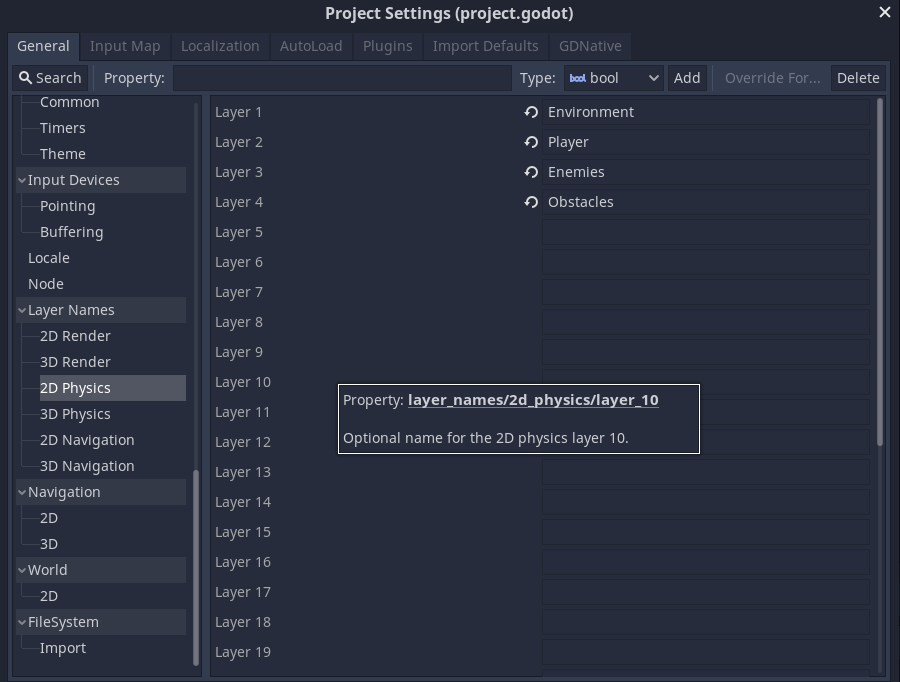
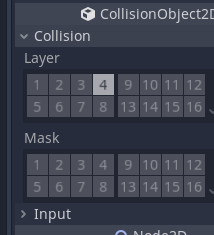
By default they are numbered 1+. We can give them more usable names in project settings.
Go to Project Settings
Scroll to Layer Names and select 2D Physics.
Below we have named Layer 1 Environment, this will store all of the scenery.
Layer 2 has the player object
Layers 3 and 4 are set as Obstacles.
You have now setup different layers and now need to modify the layers and masks for the obstacles and player.
Assigning Masks and Layers to Scenes / Nodes
Now we need to assign the layers and masks to the scenes.
First open the Player Scene.
Select the Player Node.
In collision, select Layer 2 (the player layer) and deselect all others.
Under masks select all of the layers that you want the player to interact with (1 Environment, 3 Obstacles, and 4 Enemies)
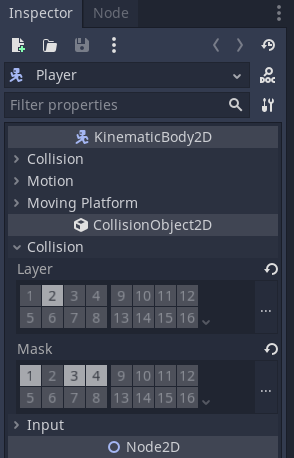
This will mean that collisions will only be detected with objects on layers 1,3 and 4.
Now open the Obstacle scene.
In the inspector set the layer to 4 as this is the obstacle layer.
Set the mask to 2 as we only want the obstacles to detect collisions with the player layer which is layer 2.
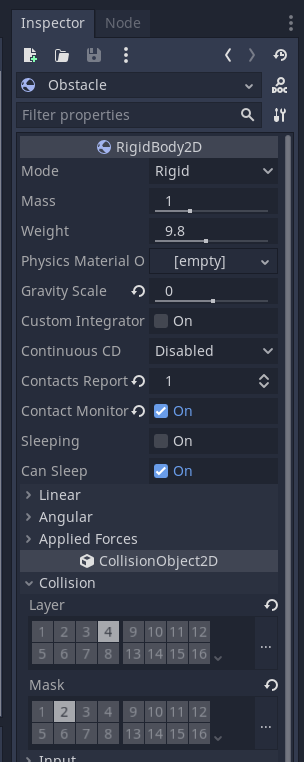
If we disable all of the masks we can test that the collisions are disabled.
We have now set up the layers and masks and are ready to add the one way collisions which will detect the player landing / jumping on top of an obstacle.
Jumping on the Obstacle / Enemy
This will handle having the player hit an obstacle on the top and then destroying the obstacle.
Select the Obstacle.
Add a new Area2D called TopArea and new CollisionShape2D and rename it TopCollision.
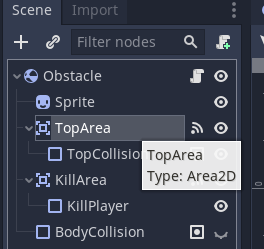
Select the CollisionShape for the area that should kill the player. Resize this so that there is an area at the top which will be used for the player to hit and kill / destroy this obstacle.
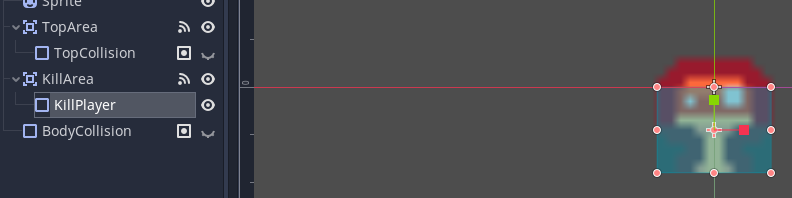
Add a RectangleShape2D to the top of the obstacle.
Resize it so that it is the area that you wish to use for the player hitting the obstacle.

Add a body_entered signal to the TopArea node.
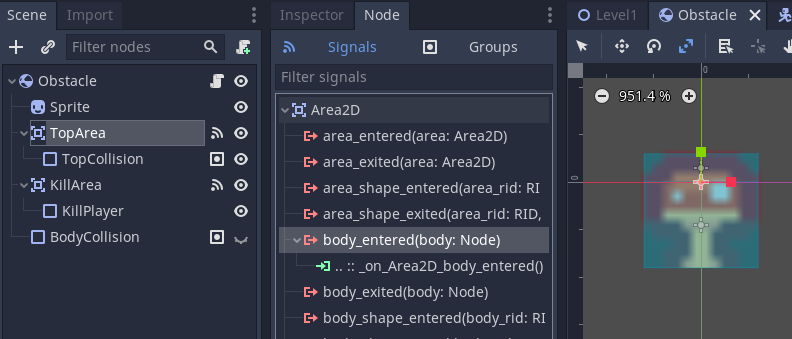
In the function add the code at 3 (optional) and 4. This will destroy the node / object when the player collides with the top of it.
extends RigidBody2D

# Declare member variables here. Examples:
# var a = 2
# var b = "text"


# Called when the node enters the scene tree for the first time.
func _ready():
	pass # Replace with function body.


# Called every frame. 'delta' is the elapsed time since the previous frame.
#func _process(delta):
#	pass

func _on_KillArea_body_entered(body):
	# 1 Print hit message
	print("Obstacle hit player")
	# 2 Call the respawn function of the player (body) using dot notation
	body.respawn()

func _on_TopArea_body_entered(body):
	# 3 Print message to test that a collision / overlap has been detected.
	print("Player hit top of obstacle")
	# 4 Queue free destroys the node / object
	queue_free()
	pass # Replace with function body.
Test your code, when you collide with the top of the player you should destroy it.


Congratulations you have core gameplay for how to destroy another object created.