Creating enemy AI in Godot 4 using the built-in Navigation System is incredibly efficient once you get the node structure down. Godot 4 uses a refined navigation server that handles pathfinding smoothly.
Here is a step-by-step Guide to creating an enemy that patrols or stands still, chases the player when they enter an Area3D, and gives up exactly 3 seconds after the player leaves.
1. Scene Setup
The Player Scene
For this Guide, assume your player is a CharacterBody3D assigned to a script.
- Crucial Step: Select your Player root node, go to the Node tab (next to Inspector), click Groups, and add the player to a group named
"player". This makes it easy for the enemy to Identify them.
The Enemy Scene
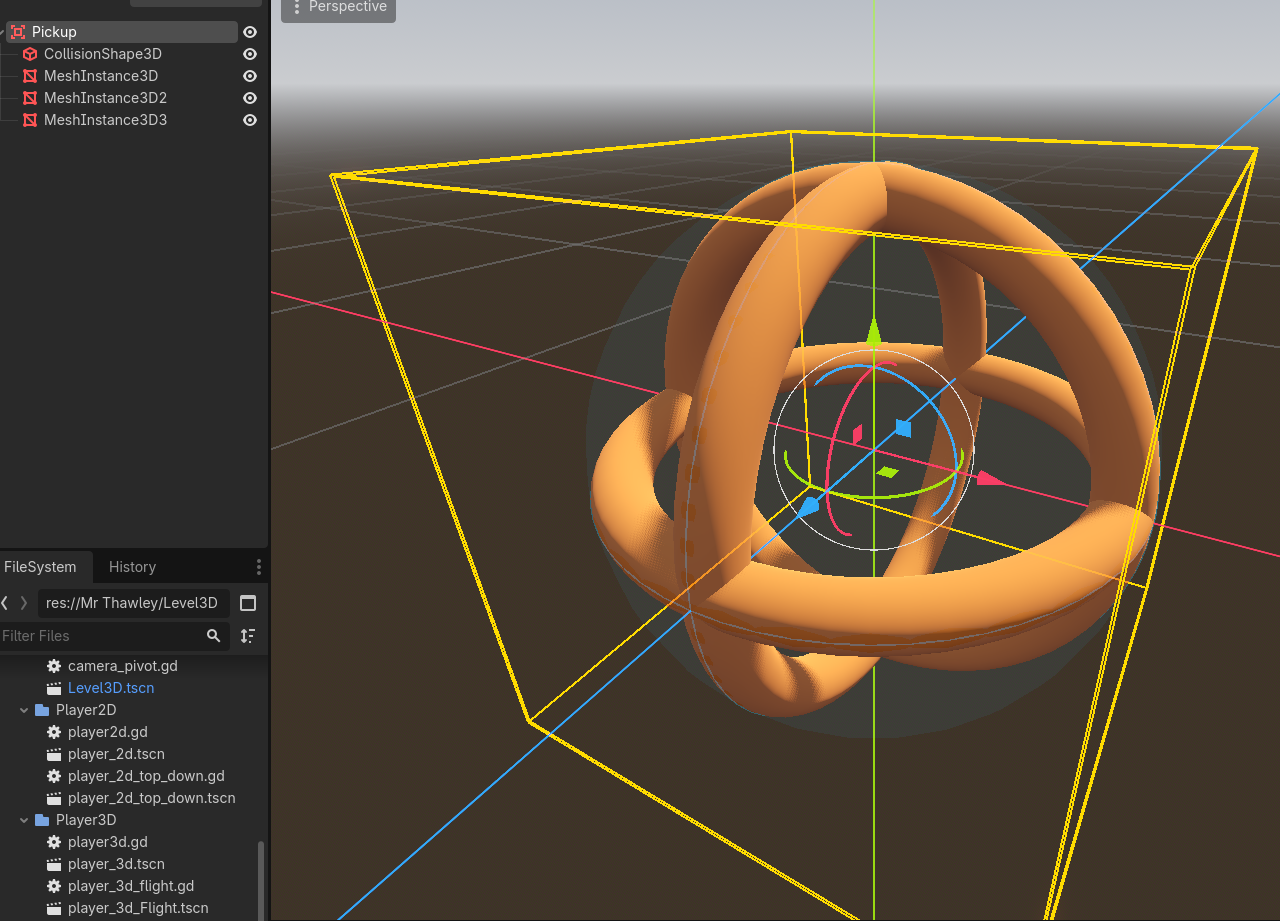
Create a new 3D scene for your enemy with the following node structure:
CharacterBody3D(Name: Enemy)MeshInstance3D(A capsule or cylinder so you can see it)CollisionShape3D(Matches the mesh)NavigationAgent3D(Handles the pathfinding calculations)Area3D(Name: DetectionArea – The trigger zone)CollisionShape3D(A large sphere or box representing the detection Range)
Timer(Name: LoseTargetTimer – SetOne Shotto On in the Inspector)
2. Setting Up the Environment (NavMesh)
For the navigation agent to move, it needs a walkability mesh.
- In your main world scene, add a
NavigationRegion3Dnode. - In the Inspector for the
NavigationRegion3D, look for the Navigation Mesh property, click<empty>, and select New NavigationMesh. - Make your floor/Environment meshes children of the
NavigationRegion3D. - Select the
NavigationRegion3Dnode and click the Bake Navigation Mesh button at the top of the 3D viewport. You should see a transparent blue overlay appearing over your walkable surfaces.
3. The Enemy AI Script
Attach a script to your Enemy (CharacterBody3D) node. Paste the following code:
extends CharacterBody3D

@export var speed: float = 4.0
@export var accel: float = 10.0

@onready var nav_agent: NavigationAgent3D = $NavigationAgent3D
@onready var lose_timer: Timer = $LoseTargetTimer

var target_player: CharacterBody3D = null
var is_chasing: bool = false

func _physics_process(delta: float) -> void:
	# If we don't have a target and aren't actively chasing, do nothing
	if not is_chasing or not target_player:
		return

	# 1. Tell the navigation agent where the player is
	nav_agent.target_position = target_player.global_position

	# 2. Check if path is finished (optional, but prevents jittering)
	if nav_agent.is_navigation_finished():
		return

	# 3. Calculate movement direction towards the next path point
	var current_pos = global_position
	var next_path_pos = nav_agent.get_next_path_position()

	# Calculate direction vector (horizontal plane only)
	var new_velocity = (next_path_pos - current_pos).normalized() * speed

	# 4. Smoothly interpolate current velocity to new velocity (Handling acceleration)
	velocity.x = move_toward(velocity.x, new_velocity.x, accel * delta)
	velocity.z = move_toward(velocity.z, new_velocity.z, accel * delta)

	# Simple gravity handling so the enemy doesn't Float if there are slopes
	if not is_on_floor():
		velocity.y -= 9.8 * delta
	else:
		velocity.y = 0

	# 5. Move the Character
	move_and_slide()
4. Connecting the Signals
To make the detection area and the timer work together, we Need to wire up Godot’s signals.
Step A: Player Enters Detection Area
- Select the DetectionArea node.
- Go to the Node tab (next to Inspector) -> Signals.
- Double-click
body_entered(body: Node3D)and connect it to your Enemy script. - Add this code inside the generated Function:
func _on_detection_area_body_entered(body: Node3D) -> void:
	if body.is_in_group("player"):
		target_player = body
		is_chasing = true
		lose_timer.stop() # Stop the countdown if the player re-enters before 3 seconds
Step B: Player Leaves Detection Area
- With DetectionArea selected, double-click
body_exited(body: Node3D)in the Signals tab and connect it to your Enemy script. - Add this code inside the generated Function:
func _on_detection_area_body_exited(body: Node3D) -> void:
	if body == target_player:
		# Start the 3-second countdown
		lose_timer.start(3.0)
Step C: Timer Runs Out
- Select your LoseTargetTimer node.
- Go to the Signals tab, double-click
timeout()and connect it to your Enemy script. - Add this code inside the generated Function:
func _on_lose_target_timer_timeout() -> void:
	# 3 seconds have passed without the player returning
	is_chasing = false
	target_player = null
Pro-Tips for Fine-Tuning
- Fixing Floating/Sinking: If your enemy clips into the ground or floats slightly above it while moving, select the
NavigationAgent3Dand tweak the Path Post Processing or adjust its Target Desired Distance. - Avoid Walls: Under the
NavigationAgent3Dproperties, look at the Pathfinding section. You can adjust the agent radius to Ensure the enemy doesn’t hug walls too tightly and get stuck on corners. - Y-Axis Locking: The pathfinding returns a 3D coordinate vector. If your map has hills,
move_and_slide()handles the slopes smoothly using the gravity snippet provided above.