Picking Up Items - Storing Values in a List/Array
This guide will cover how to use an Array to store the amount of different items that have been picked up.
It assumes that you have a project with a player character that can be moved around already being created and a basic world.
This example uses a 3D plane and a cube as a character but will work with 2D games. You can use the 2D physics objects instead if building a 2D game (although the 3D ones should still work).

The following script is assigned to a Player Object
using System.Collections;
using System.Collections.Generic;
using UnityEngine;

public class PlayerController : MonoBehaviour
{
    public float speed = 5;
    private Rigidbody rb;


    public void Start()
    {
        rb = GetComponent<Rigidbody>();
    }

    public void Update()
    {
        float h = Input.GetAxisRaw("Horizontal");
        float v = Input.GetAxisRaw("Vertical");

        Vector3 tempVect = new Vector3(h, 0, v);
        tempVect = tempVect.normalized * speed * Time.deltaTime;
        rb.MovePosition(transform.position + tempVect);
    }
}
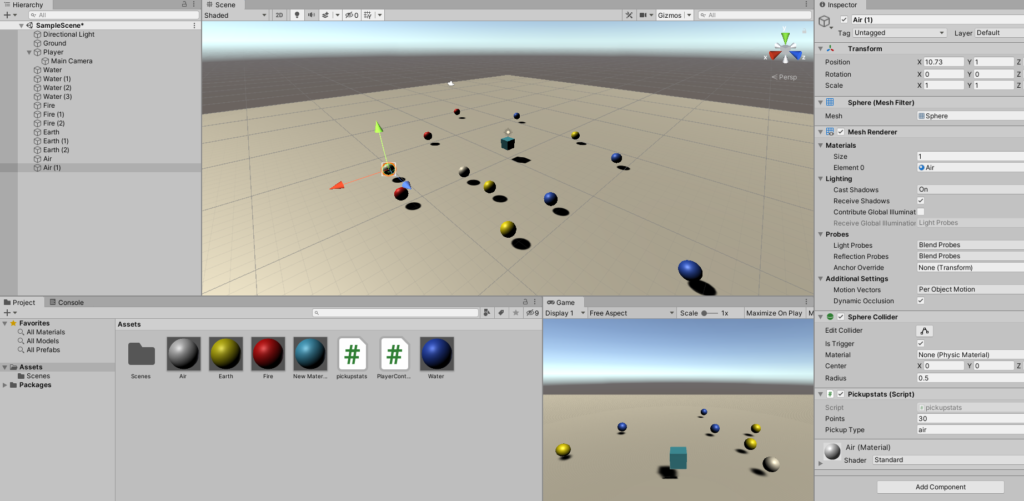
Create a gameobject for the pickup (this example uses a sphere
Create a material and attach it to the pickup

In the hierarchy select the pickup item and add a tag
The tag is in the the Inspector panel

Create a custom tag called pickup

Click Add Tag


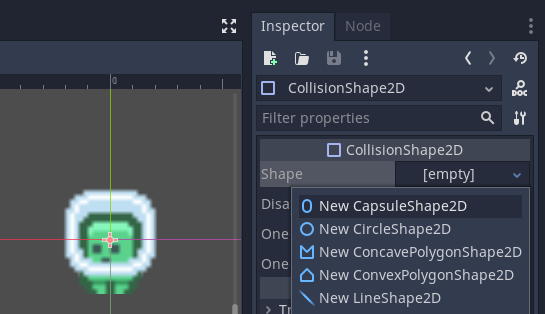
On the sphere collider for the pickup item tick is trigger

Create a PickUpStats class / script and add this to the pickup object

Open the PickUpStats script and edit it.
Add two variables, points and pickUpType
public class pickupstats : MonoBehaviour
{
    public int points;
    public string pickupType;

    // Start is called before the first frame update
    void Start()
    {

    }

    // Update is called once per frame
    void Update()
    {

    }
}
In the Inspector Panel enter values for the pickup.
For using the inventory it's important to give each Pickup Type a different name as we will be using this to update the inventory value.

Copy this pick gameobject and make multiple on the scene. You can use a prefab for this.
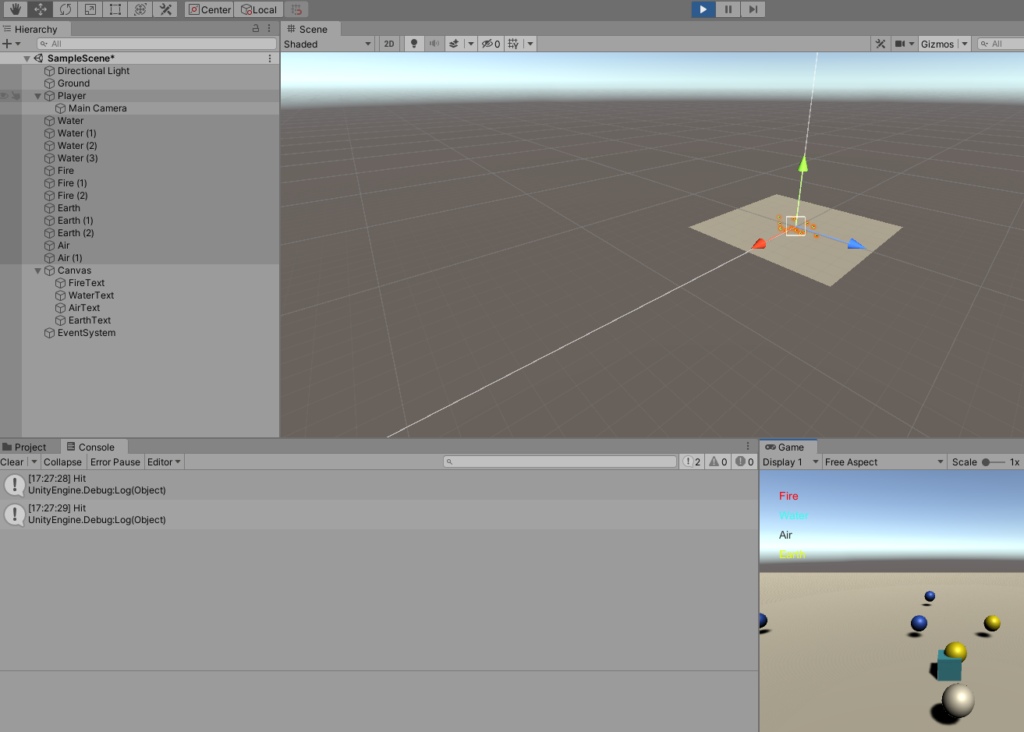
We've now finished setting up the play area.
Now we need to setup the UI elements to display the values on the screen.
Add four text UI elements
Name each appropriately for the inventory items, in this example for each element.

Double click on a Text UI element
It'll appear out of size, don't worry
All UI elements are placed on a Canvas.
We can see how it'll look in the Game panel

We want to position these in the top right corner.
UI elements have a Rect Transform component.
We can position objects on these
The Alt and Shift keys are modifiers for these
Click on the Rectangle to open up the layout grid options
Hold down Alt and Shift and select the desired location (top left)
Adjust and X and Y values to position correctly.
Change the text on the component as well
Change the colour if needed. Make sure that it can still be read on any background
Note the example below shows a bad example of colour choices.
Create a new script called PlayerInventory
You can add this code to the existing PlayerController but it makes it easier to manage in a separate script.
Add this to the player object

Do note that this is inefficient code.
It is to setup the inventory and update values to get people using arrays.
Add the inventory arrays. These are set to four as there are four items for the inventory
public string[] inventoryName = new string[4];
public int[] inventoryNum = new int[4];
Below is the complete class at this stage.
using System.Collections;
using System.Collections.Generic;
using UnityEngine;

public class PlayerInventory : MonoBehaviour
{
    public string[] inventoryName = new string[4];
    public int[] inventoryNum = new int[4];


    // Start is called before the first frame update
    void Start()
    {

    }

    // Update is called once per frame
    void Update()
    {

    }
}
Now we need to import the Unity UI engine.
Add using UnityEngine.UI; to the program.
Then add another array of Text objects to store the four text boxes on the UI.
using System.Collections;
using System.Collections.Generic;
using UnityEngine;
using UnityEngine.UI;

public class PlayerInventory : MonoBehaviour
{
    public string[] inventoryName = new string[4];
    public int[] inventoryNum = new int[4];
    public Text[] inventoryTextUI = new Text[4];

    // Start is called before the first frame update
    void Start()
    {

    }

    // Update is called once per frame
    void Update()
    {

    }
}
Now switch back to the Unity Editor.
We are going to link up the UI Text boxes to the array.
Select the Player object
In the PlayerInventory script component expand the Inventory Text UI array

Click on the . next to each element
Then select a different element text box for each element index.
Go back to your code editor
Inside the start function assign each index of the inventoryName array to one of the elements (keep these in the same order as the ones above to make your life easier).
void Start()
    {
        inventoryName[0] = "air";
        inventoryName[1] = "earth";
        inventoryName[2] = "fire";
        inventoryName[3] = "water";
    }
Now we need to detect if we have picked up an item.
This is done by using the OnTriggerEnter function.
Add this to your PlayerInventory script
private void OnTriggerEnter(Collider other)
    {

    }
other is the collider component of the object we have triggered an event with.
This will only work if the Is Trigger box is set in Unity for the collider.
Make sure you have a tag "pickup" assigned for each item that you want to be a pickup.
Modify this code to:
private void OnTriggerEnter(Collider other)
    {
        if (other.gameObject.CompareTag("pickup"))
        {
            Debug.Log("Hit");
        }
    }
Run the program. When you hit a pickup the Console should display a hit message
If this isn't working check steps above.
Now let's add some points for collecting the items.
Now we want to find out what type of pickup we have.
Remember we wrote a script with two variables for the Pickup items.
We want to access the pickupType
string temp = other.gameObject.GetComponent<pickupstats>().pickupType;
This line of code will get the pickupType variable from the pickupstats script.
The script name is written inside the < >
other gets the collider
then .gameObject gets the objects it's attached to
we the use .GetComponent<>() to get the components (script) to access.
Finally we get the variable value and assign it to the variable temp
Now we want to check the steps involved
We need a for loop.
Add this after the previous line.
private void OnTriggerEnter(Collider other)
    {
        if (other.gameObject.CompareTag("pickup"))
        {
            Debug.Log("Hit");
            string temp = other.gameObject.GetComponent<pickupstats>().pickupType;
            for(int i = 0; i < inventoryName.Length; i++)
            {

            }
        }
    }
This for look will start at index 0 and go to the end of the inventoryName array. We find the length with arrayName.Length
Inside the for loop we add an if statement to check if the current item matched the one we are looking for.
            for (int i = 0; i < inventoryName.Length; i++)
            {
                if (inventoryName[i] == temp)
                {
                }
            }
If there is a match we want to change the score in the inventoryNum array at the same index.
                if (inventoryName[i] == temp)
                {
                    inventoryNum[i] = inventoryNum[i] + 1;
                    Debug.Log(temp + " : " + inventoryNum[i]);
                }
We also include a Debug statement to print out the message.
Finally set the object to inactive
other.gameObject.SetActive(false);
The finished file will look like this:
using System.Collections;
using System.Collections.Generic;
using UnityEngine;
using UnityEngine.UI;

public class PlayerInventory : MonoBehaviour
{
    public string[] inventoryName = new string[4];
    public int[] inventoryNum = new int[4];
    public Text[] inventoryTextUI = new Text[4];

    // Start is called before the first frame update
    void Start()
    {
        inventoryName[0] = "air";
        inventoryName[1] = "earth";
        inventoryName[2] = "fire";
        inventoryName[3] = "water";
    }

    // Update is called once per frame
    void Update()
    {

    }

    private void OnTriggerEnter(Collider other)
    {
        if (other.gameObject.CompareTag("pickup"))
        {
            Debug.Log("Hit");
            string temp = other.gameObject.GetComponent<pickupstats>().pickupType;
            for (int i = 0; i < inventoryName.Length; i++)
            {
                if (inventoryName[i] == temp)
                {
                    inventoryNum[i] = inventoryNum[i] + 1;
                    Debug.Log(temp + " : " + inventoryNum[i]);
                    other.gameObject.SetActive(false);
                }
            }
        }
    }
}
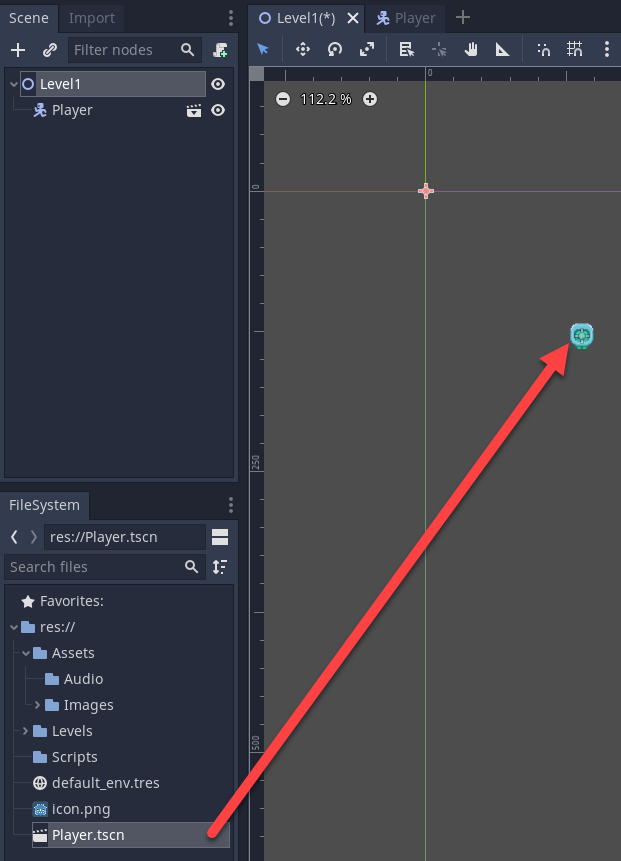
Test your program.
Here you can see it working
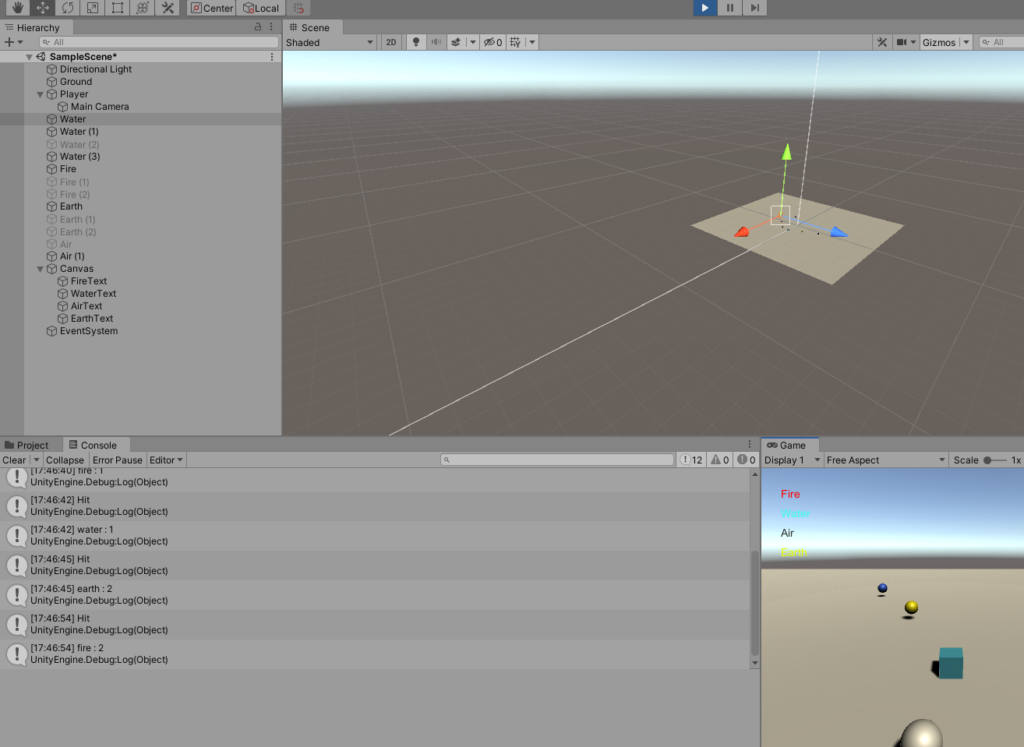
Finally we need to add code to display the inventory levels on the screen.
Create a new function in the PlayerInventory script
void SetInventoryDisplay()
    {
        //Set the text property of our our countText object to "Count: " followed by the number stored in our count variable.
        for(int i = 0; i < inventoryName.Length; i++)
        {
            inventoryTextUI[i].text = inventoryName[i] + " : " + inventoryNum[i].ToString();
        }
    }
This will iterate through the items in the inventoryName array and then update the items in the inventoryTextUI array with the name and the number stored.
add a call to this function as the last line in the OnTriggerEnter function.
    private void OnTriggerEnter(Collider other)
    {
        if (other.gameObject.CompareTag("pickup"))
        {
            Debug.Log("Hit");
            string temp = other.gameObject.GetComponent<pickupstats>().pickupType;
            for (int i = 0; i < inventoryName.Length; i++)
            {
                if (inventoryName[i] == temp)
                {
                    inventoryNum[i] = inventoryNum[i] + 1;
                    Debug.Log(temp + " : " + inventoryNum[i]);
                    other.gameObject.SetActive(false);
                }
            }
        }
        SetInventoryDisplay();
    }
Run the program. You've now got a rudimentary inventory system.