Point and Click Movement - Player Pathfinding using a Navmesh
Click the image to load a preview.
We will be creating a program where the player will move towards a location that we click on the screen.
We will identify this location by creating an object there as a destination marker.
Grab the Unity Level Prefab. This is made using ProBuilder so you might need to add this to your package.
This tutorial uses the new Input System.
Enabling the Input System
First enable the new InputSystem
Go to Window > Package Manager

Switch to Unity Registry and then search for Input System

Click the install button.
If you haven't enabled the input system before for this project Unity will ask to restart.
Save your work and allow it to restart.
There are some additional settings but these are best handled when we first want to handle inputs.
Creating a Level
Create a new scene with a plane on the ground and place some object on it. You might want to use ProBuilder for this.
Position the camera so that you can see the entire scene.

It is often useful to create an empty GameObject to store the elements of the level.

Creating a Player
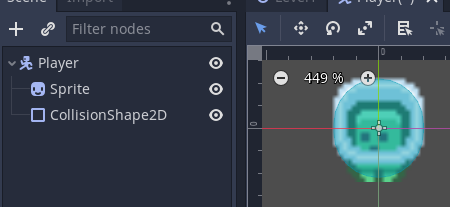
Now add a player object. This example uses one with a CharacterController.
The player is simply a Capsule with a deformed cube as a visor so we can see the direction it is facing.
Good practice would be to convert the level and player into prefabs.

We now have our level and player. We now need a target to move towards

Creating a destination target
Create a GameObject and place it on the scene.
Change the name of this to Destination or similar. This will be the point that we want our player to move towards.
Make sure that it is easily seen in game view. You could add a material to it.

Destination Marker - Adding Player Input and Actions�
Add a PlayerInput component to this object.

There are no actions created by default.
Click the Create Actions... button.

Save the Input Actions
This is a file that has setup some default inputs for keyboard, controller, mouse for both a player and the UI.

It hasn't attached them to the Player Input component yet. Click on the target to bring up the selector.

Select the InputActions you created.
Now as we are going to be interacting with the screen we need to switch the Default Map from Player to UI.

Our destination marker is now set up, we just need to add some code to the desitnation marker object.
Click Add Component > New Script
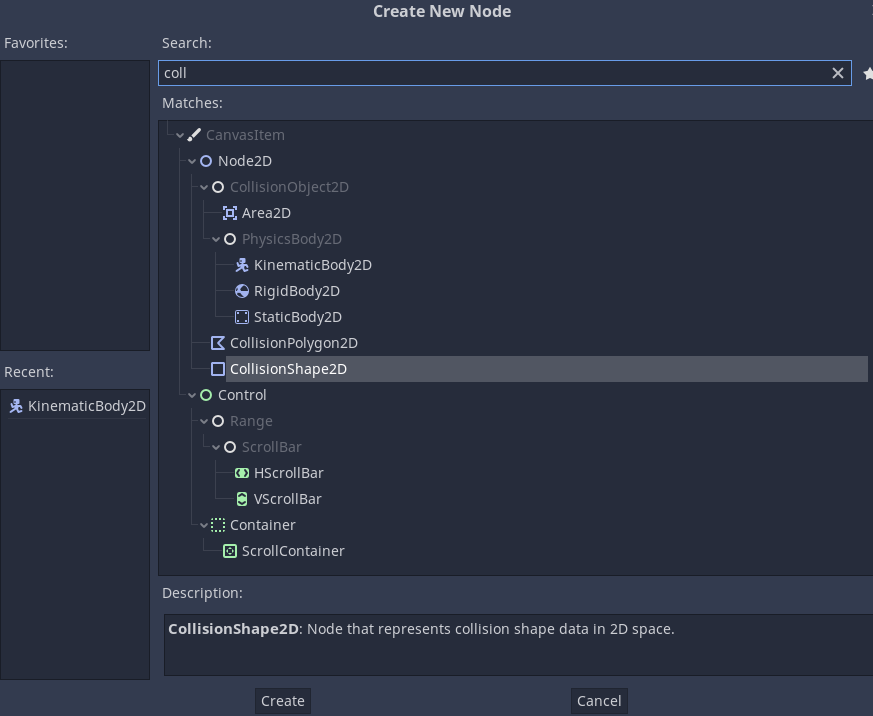
Give the script a name such as SetDestination.

Alternatively you can create the script by right clickin the in project folder and selecting Create > C# Script
You then need to drag the script onto the Inspector. Or Click Add Component and search for the filename of the script.
SetDestination Script - Using Raycasts to get the position
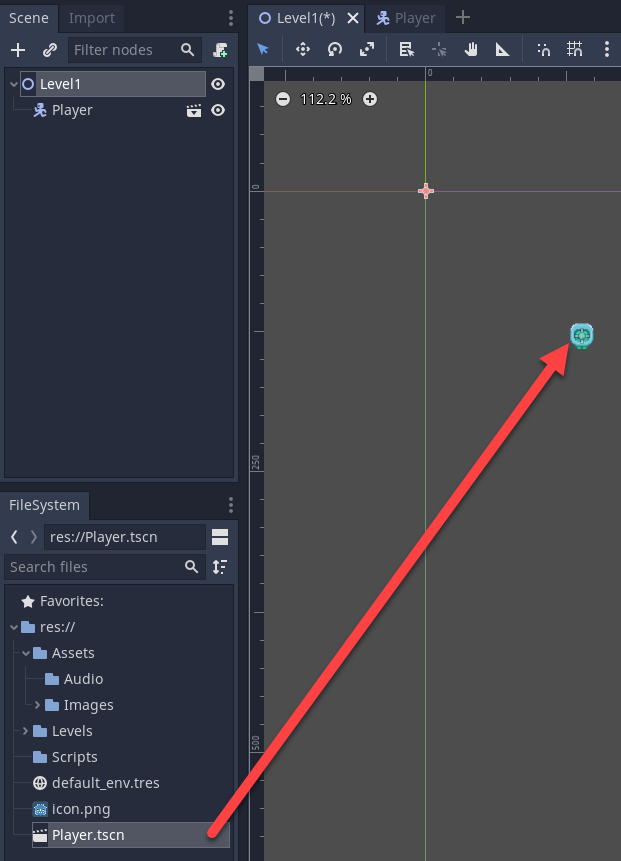
This next step involves writing code that will take the position we click with the mouse (or touch with the screen) and draw a ray (line) from that point on the camera directly to the first object that it hits in the level.
For example if I were to click where the black arrow is the green destination marker will move to that point.

Open your script.
We need to include both the UnityEngine.InputSystem and UnityEngine.InputSystem.UI libraries.
Add these in on lines 4 and 5. This enables us to use the new input system and its UI in code.
using System.Collections;
using System.Collections.Generic;
using UnityEngine;
using UnityEngine.InputSystem.UI;
using UnityEngine.InputSystem;

public class SetDestination : MonoBehaviour
{
}
Inside the class we need to create a variable to store the targetPosition for the player.
To do this we will create a Vector3.
In the Start() method we want to instantiate the targetPosition variable to the initialy destination location we have set on the scene / level.
using System.Collections;
using System.Collections.Generic;
using UnityEngine;
using UnityEngine.InputSystem.UI;
using UnityEngine.InputSystem;

public class SetDestination : MonoBehaviour
{

    Vector3 targetPosition;
    void Start () {
        targetPosition = transform.position;
    }
}
Now we need to handle the user clicking on the screen.
With the old input system you would carry this out in the update function. This is inefficient as it would run or at least check every update. The new input system is event driven so the code is only run when a click occurs.
We need to find out the title of the event to run.
Go back to Unity and click on the Input Action Asset that is part of the Player Input component on the destination market gameobject.
This will bring up the Input Actions Map.
Click on UI to see the UI actions that have been created by default (or you have created)
We can see there is a click event that is handled by a button.

There a a number of ways to handle this. We will keep it simple using the Send Messages option.
We can access and of these actions by writing a method with the word On in front of it.
We will make an OnClick() method.
On lines 15-17 add the void OnClick() method.
Remember void means it does not return a value.
Inside the method add a Debug.Log() call and print a suitable message. This is shown on line 16.
using System.Collections;
using System.Collections.Generic;
using UnityEngine;
using UnityEngine.InputSystem.UI;
using UnityEngine.InputSystem;

public class SetDestination : MonoBehaviour
{

    Vector3 targetPosition;
    void Start () {
        targetPosition = transform.position;
    }

    void OnClick() {
        Debug.Log("Clicked");
    }

}
Run the program to test is works. Look in the console for the message when you click the mouse.
Now we need to create the ray to check between two points and the RaycastHit to store if the hit has been made.
Replace the debug line with RaycastHit hit; to create the raycast hit object that will be used to store if there was an object that the ray collided with.
The next line on line 17 creates the ray from the position on the camera in 3D space towards the object in the scene that is in line with the mouse pointer location.
Camera.main gets the main camera.
The methods ScreenPointToRay() is takes one argument the x,y position of the mouse in this case and creates a ray that is stored in the variable ray.
Mouse.current.position.ReadValue() gets the Mouse static object then gets the currently active mouse with .current it then get the position with .position and then finally reads the value of the position with .ReadValue()
This returns a Vector2 which is converted to a Vector3.
using System.Collections;
using System.Collections.Generic;
using UnityEngine;
using UnityEngine.InputSystem.UI;
using UnityEngine.InputSystem;

public class SetDestination : MonoBehaviour
{

    Vector3 targetPosition;
    void Start () {
        targetPosition = transform.position;
    }

    void OnClick() {
        RaycastHit hit;
        Ray ray = Camera.main.ScreenPointToRay(Mouse.current.position.ReadValue());

    }

}
We now need to check if the ray hit by casting this ray out.
Line 18 has an if statement where the condition runs the Raycast method of the Physics class. Raycast takes two arguments the ray and a RaycastHit object to determine if it was hit or not. It uses this over a boolean as we often want more information such as what object was hit and the point or location it was hit.
out hit means we can pass a variable to a function with out it having been assigned. This is the case here as shown by the variable hit being declared but no value assigned to it.
If it detects a hit, aka Physics.Raycast() returns true then we proceed with the code on lines 20 and 21.
This updates the targetPosition variable to the hit.point which is the Vector3 of where the ray hit the object in the scene.
Finally we transform the position of the current object to the targetPosition using transform.position = targetPosition;
using System.Collections;
using System.Collections.Generic;
using UnityEngine;
using UnityEngine.InputSystem.UI;
using UnityEngine.InputSystem;

public class SetDestination : MonoBehaviour
{

    Vector3 targetPosition;
    void Start () {
        targetPosition = transform.position;
    }

    void OnClick() {
        RaycastHit hit;
        Ray ray = Camera.main.ScreenPointToRay(Mouse.current.position.ReadValue());
        if (Physics.Raycast(ray, out hit))
        {
            targetPosition = hit.point;
            transform.position = targetPosition;
        }
    }

}
Test your program.
The destination marker should now move to where you click.


You should look for how you could improve and tidy up this code. There are some significant improvements that could be made to reduce the use is additional variables.
Creating a Navigation Mesh
Return to Unity and create a new empty GameObject, name it NavMesh or similar.

Move all of the objects to be part of this navigation mesh to be children of the LevelNavMesh object.
Go to Window > AI > Navigation
A Navigation panel should appear.

We only really need to worry about three of the tabs: Agents, Bake, and Object.
Click Agents
Here you can set the name of the AI agent (that will be applied to an object) and some key properties.
You can hover over them for more info.
- Name - the agents name
- Radius - the width or space between the object and the wall
- Height - the height of the object, this helps detect if it can pass under something
- Step Height - The maximum height of step that the agent can move up
- Max slope - the maximum slope that the agent can move up, any higher and it won't try.
Adjust these as you see fit.

Now click on Object
We need to select all of the objects that will be part of this navmesh. This is where having a clear hierarchy makes life easier.
Select all of the objects in the heirarchy.
Then check Navigation Static.
By default all of these areas are walkable.
Now click on Bake.
Don't worry too much about these settings. just click on Bake.
We now have a navmesh created.
The blue areas are where we can walk.

If we want to make a specific area not walkable select the object in the hierarchy and then change its navigation area to be Not Walkable.

You then need to bake the navmesh again.
You will now see that the area is now not walkable.
Moving the Player to the Destination
We're nearly there. Now we need to add the agent to the player (or any object) and add the script to get them to move to our destination marker.
Note that adding the agent to other objects will get them to move using the navmesh we have created. This will greatly help with AI and pathfinding for enemies. But we're not worrying about that here.
Select the player object.
Show the Inspector.
Click Add Component
Add a Nav Mesh Agent.

Leave the setting as they are (unless you have a different named agent).
Now we need to add a script to the player.
Create a script MoveToDestination and add it to the inspector
Open the script.
On line 4 import the UnityEngine.AI package. This enable the use of the nav mesh agents.
On lines 8-11 create three variables. One public GameObject which will store the target destination object, this is on line 8.
Line 10 creates a variable to set the speed of the player.
Line 11 creates a variable to store the navmesh agent. This will be assigned later.
using System.Collections;
using System.Collections.Generic;
using UnityEngine;
using UnityEngine.AI;

public class MoveToDestination : MonoBehaviour
{
    public GameObject target;
    public int speed = 5;

    private NavMeshAgent navAgent;

}
Now add the Start() method.
The only interesting part here is line 15. This gets the NavMeshAgent component and assigns it to the navAgent variable. Now we can access the nav mesh agent through script easily.
using System.Collections;
using System.Collections.Generic;
using UnityEngine;
using UnityEngine.AI;

public class MoveToDestination : MonoBehaviour
{
    public GameObject target;
    public int speed = 5;

    private NavMeshAgent navAgent;
    // Start is called before the first frame update
    void Start()
    {
        navAgent = GetComponent<NavMeshAgent>();
    }

}
Our final piece of code is the update method.
There are three stages to this. The first two are optional but rotate the player to look at the destination.
- Set the nav mesh agent's destination to the target destination.
- (Optional) Get the target destination x, y, and z coordinates as a Vector3 object.
- (Optional) transform the player object to look at the destination
This is shown in lines 22,24 and 26.
Line 22 handles the nav mesh agent movement.
navAgent.SetDestination(Vector3 d) is the SetDestination method of the navAgent from earlier. We pass this the position that we want to move the player to. this is form the target GameObject from earlier. We need to get the transform of this and then the position. We achieve this with target.transform.position
Line 24 creates a Vector3 called targetPosition, this is where we want the player agent to go to.
We create a new Vector3. This is given the x and z coordinated for the target destination object. We give this vector the players y value otherwise our player will rotate to directly face the target on all three x, y, and z axis.
Line 26 will transform the player to face the target destination vector.
using System.Collections;
using System.Collections.Generic;
using UnityEngine;
using UnityEngine.AI;

public class MoveToDestination : MonoBehaviour
{
    public GameObject target;
    public int speed = 5;

    private NavMeshAgent navAgent;
    // Start is called before the first frame update
    void Start()
    {
        navAgent = GetComponent<NavMeshAgent>();
    }

    // Update is called once per frame
    void Update()
    {
        // move the player towards the target,
        navAgent.SetDestination(target.transform.position);
        // Set the target but do not include the targets y axis as this would rotate the player, use the player y axis to maintain verticality
        Vector3 targetPosition = new Vector3(target.transform.position.x, this.transform.position.y, target.transform.position.z);
        // Transform the player to look at the target.
        transform.LookAt(targetPosition);
    }
}
Save your file and head back to the Unity editor.
Drag (or click the target) and add the Destination GameObject to the MoveToDestination script.
Testing
Run the program and click different locations.
Your player should now move towards them.
All of the Scripts
using System.Collections;
using System.Collections.Generic;
using UnityEngine;
using UnityEngine.InputSystem.UI;
using UnityEngine.InputSystem;

public class SetDestination : MonoBehaviour
{
    Vector3 targetPosition;
    void Start () {
        targetPosition = transform.position;
    }

    void OnClick() {
        RaycastHit hit;
        Ray ray = Camera.main.ScreenPointToRay(Mouse.current.position.ReadValue());
        if (Physics.Raycast(ray, out hit))
        {
            targetPosition = hit.point;
            transform.position = targetPosition;
        }
    }

}
using System.Collections;
using System.Collections.Generic;
using UnityEngine;
using UnityEngine.AI;

public class MoveToDestination : MonoBehaviour
{
    public GameObject target;
    public int speed = 5;

    private NavMeshAgent navAgent;
    // Start is called before the first frame update
    void Start()
    {
        navAgent = GetComponent<NavMeshAgent>();
    }

    // Update is called once per frame
    void Update()
    {
        // Set the target but do not include the targets y axis as this would rotate the player, use the player y axis to maintain verticality
        Vector3 targetPosition = new Vector3(target.transform.position.x, this.transform.position.y, target.transform.position.z);
        // Transform the player to look at the target.
        transform.LookAt(targetPosition);
        // move the player towards the target,
        navAgent.SetDestination(target.transform.position);
    }
}