Twin Stick Movement (Left Move, Right Look Direction)
Here we will use the input system to move a player in a twin stick format.
This will include Controller and Keyboard and Mouse controls.
For a controller the left stick will control movement and the right stick will control the direction the player is looking.
For Keyboard and Mouse the Keyboard will control movement and the mouse will determine which way the player is looking.
Create a test environment for your player to move around in.
Create a new prefab using an empty GameObject for the player.
Add your player Object, in this case a capsule.
Make sure that you can identify the front of the character (z axis).
This example has added a rectangle in the front of the character and some arms.
Now add some materials or textures to make it easier to see.
Add a CharacterController component to the player prefab
We will use CineMachine to handle the camera.
If you haven't installed CineMachine add it using the Package Manager
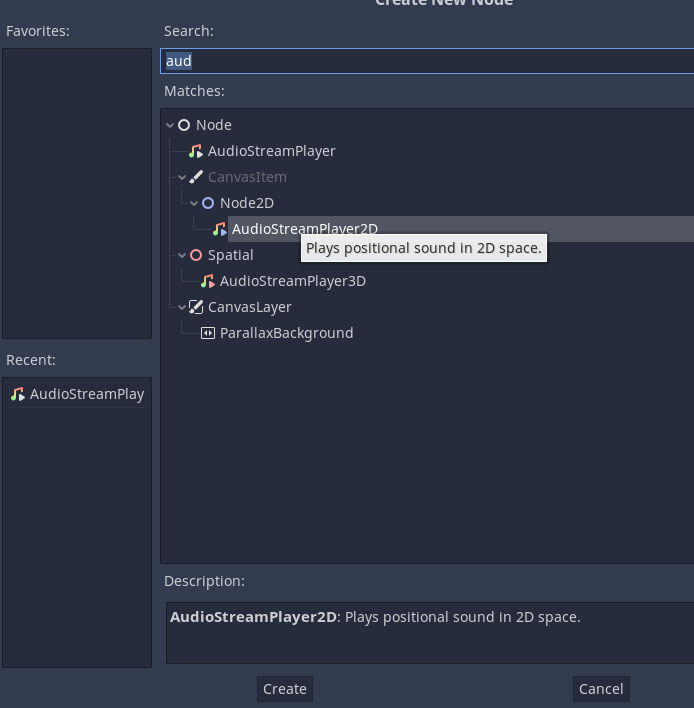
Add a CineMachine Virtual Camera.
Rename the camera PlayerCamera
Set the camera to look at and follow the Player Capsule (or other object).
Move and position the camera in the location you want. In this case we will position it above the player and looking down at it.
To do this we set the Virtual Camera's settings for the Transitions > Body to Do Nothing, and adjust then adjust the y transform position.
Add the player to the scene.
We can now see a top down view of our player in the Game preview window.
We haven't added and scripting to move our player yet, so it won't move. Let's do that next.
If you haven't already add the Input System Package using the Package Manager.
This might need to restart Unity if it hasn't been added already.
Open the Player Prefab
Add the Player Input component.

If you want to use the default Input Actions (Move, Look, Fire) click Create Actions... otherwise add in your own custom Input Actions.
To learn how to create your own custom Input Actions see the lesson here.
We need to have a Move and a Look input action setup.

Now we need to add code to move the player.
Select the InputActions in the Project panel.

In the Inspector, check the Generate C# class checkbox.
Click Apply

Moving the player
Create a new script. The one in this example is called TwinStickPlayerManager

Attach the script to the Player prefab

Open the script.
Add a call to import / use the InputSystem package as shown on line 4
using System.Collections;
using System.Collections.Generic;
using UnityEngine;
using UnityEngine.InputSystem;

public class TwinStickPlayerManager : MonoBehaviour
{
    // Start is called before the first frame update
    void Start()
    {

    }

    // Update is called once per frame
    void Update()
    {

    }
}
We need to use the Character Controller. Add a variable for this.
We have created the variable on line 8. Remember we use _ for the start of private variables that are only accessed within this class / script.
On line 13 we assign the CharacterController component of the player object (or any object this script is attached to) to the variable _cc.
using System.Collections;
using System.Collections.Generic;
using UnityEngine;
using UnityEngine.InputSystem;

public class TwinStickPlayerManager : MonoBehaviour
{
    CharacterController _cc;

    // Start is called before the first frame update
    void Start()
    {
        _cc = GetComponent<CharacterController>();
    }

    // Update is called once per frame
    void Update()
    {

    }
}
Now we need to add in a method to detect when the move input is pressed.
As the control is named Move we name the method OnMove. If the control was named Look we would name the method OnLook.
Lines 22-25 contain this method. Line 22 declares / creates the method with the name OnMove(). Inside the () we have one parameter of the type InputValue. This only exists for this method. The name of this parameter is iv.
Inside this method is one line (line 24) which we will use to debug and check that the Move input is being detected. Finally the method is closed by a } on line 25.
using System.Collections;
using System.Collections.Generic;
using UnityEngine;
using UnityEngine.InputSystem;

public class TwinStickPlayerManager : MonoBehaviour
{
    CharacterController _cc;

    // Start is called before the first frame update
    void Start()
    {
        _cc = GetComponent<CharacterController>();
    }

    // Update is called once per frame
    void Update()
    {

    }

    public void OnMove(InputValue iv)
    {
        Debug.Log("Move!");
    }
}
Now run your program and when you move using the left gamepad or press WASD you should see Move! appear in the console.
Note the character still isn't moving on the screen.
Now we need to get the character moving on the scene.
Add a variable of type Vector2 to store the x and y input from the player controller. This is shown on Line 9 and is called _movementInput.
Next we replace the Debug.Log("Move!"); line of code with code to store the movement value. This is now shown on line 26.
We take the InputValue (iv) and get the Vector2 data that is stored in it and assign it into the variable _movementInput.
Finally we need to move the player prefab.
First we create a Vector3 object to store the direction we want to move the player prefab.
This is shown on line 20. Note that we create a new Vector3 object. However we apply the x input from _movemenetInput to the x value for the Vector3 and the _movementInput's y value to the z value for the Vector3. This is because the y axis in a 3D vector is for the vertical axis and we want to move our player on the z axis which represents forward and back.
Finally we use the character controllers SimpleMove method to move the character. This will apply basic gravity (but doesn't allow us to jump or move vertically). This is shown on line 21.
using System.Collections;
using System.Collections.Generic;
using UnityEngine;
using UnityEngine.InputSystem;

public class TwinStickPlayerManager : MonoBehaviour
{
    CharacterController _cc;
    Vector2 _movementInput;

    // Start is called before the first frame update
    void Start()
    {
        _cc = GetComponent<CharacterController>();
    }

    // Update is called once per frame
    void Update()
    {
        Vector3 movement = new Vector3(_movementInput.x, 0, _movementInput.y);
        _cc.SimpleMove(movement);
    }

    public void OnMove(InputValue iv)
    {
        _movementInput = iv.Get<Vector2>();
    }
}
Save the file and test your player movement.
You should be able to move in all directions.
To adjust the speed of the character look at other tutorials regarding player movement.
Rotating the player (looking in a direction)
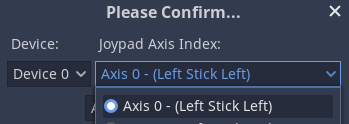
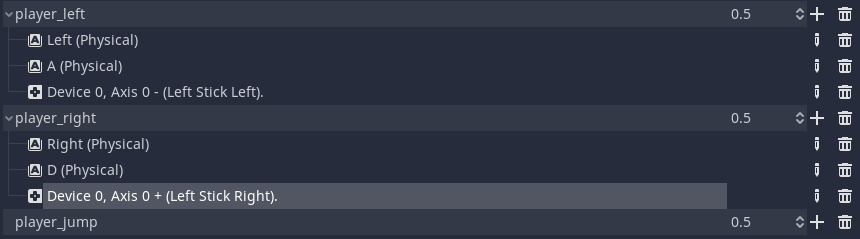
In the input actions create a new binding called look (if you don't already have one)
Add Delta [Pointer] as a binding for the mouse and Right Stick for the gamepad.
First we will get the input working with the Gamepad.
Add in a Vector2 to store the look or rotation input. This is shown on line 10 and the variable is named _lookInput.
Next we add a method similar to the OnMove one but for the Look input action.
The only changes for this are the method name to OnLook and that it will assign the value to the _lookInput variable we created earlier. This is shown on lines 33 to 36.
Finally we need to detect the direction we want the player object to face and rotate the object to that direction.
On line 24 we create a Vector3 called playerDirection, this will store the direction we want the object to face. We take the Vector3.right value an multiply it by the _lookInput.x value to get the horizontal direction to point towards. Then we multiply the Vector3.forward by the _lookinput.y value to get the forward and back (z axis) direction. We add thest two vectors together to get the direction to point the player towards.
Finally on Line 25 we adjust the rotation of the player object transform to look at the direction we have just created. We use the LookRotation method of the Quaternion class for this. This takes two arguments the Vector3 to rotate towards and the Axis to rotate around (Vector3.up).
using System.Collections;
using System.Collections.Generic;
using UnityEngine;
using UnityEngine.InputSystem;

public class TwinStickPlayerManager : MonoBehaviour
{
    CharacterController _cc;
    Vector2 _movementInput;
    Vector2 _lookInput;

    // Start is called before the first frame update
    void Start()
    {
        _cc = GetComponent<CharacterController>();
    }

    // Update is called once per frame
    void Update()
    {
        Vector3 movement = new Vector3(_movementInput.x, 0, _movementInput.y);
        _cc.SimpleMove(movement);

        Vector3 playerDirection = Vector3.right * _lookInput.x + Vector3.forward * _lookInput.y;
        transform.rotation = Quaternion.LookRotation(playerDirection, Vector3.up);
    }

    public void OnMove(InputValue iv)
    {
        _movementInput = iv.Get<Vector2>();
    }

    public void OnLook(InputValue iv)
    {
        _lookInput = iv.Get<Vector2>();
    }
}
Save the code and test it with a gamepad. Note that if you test this with a mouse at the moment the cursor will glitch out and jump around.
First open the input actions and change the Look for the Mouse from Delta to Poisition.
Now we need to check if the controls have changed / switched between the Gamepad and the mouse. This is because we need to handle the player rotation differently for each.
First add a bool variable to store which input type is being used. This is shown on line 11 with the variable isGamepad. We initially set this to false.
Next we will add a method to detect if the controls have been changed. This is shown on lines 50-56, This method takes one parameter PlayerInput which is given the name pi in this example.
Line 51 will check if the control scheme is Gamepad. This must match one that is in the InputActions.
Inside the if statement condition we find the currentControlScheme using pi.currentControlScheme and then check if it is equal to the one we want using the Equals method.
If it is we set the variable to true, otherwise we set it to false.
Next we need to modify the Update function so that it can switch between the input types. The existing code (now on lines 26 and 27) are enclosed in an if statement as shown on lines 25-28.
Next we add an else branch to the if statement. This will run the code for handling the mouse direction of the player.
We need to use a raycast to detect where the mouse is. Line 29 creates a ray taking the mouse position (stored in _lookInput) and points it at x, y position on the screen.
Line 30 creates a plane to represent the ground.
Line 31 creates a float to store the result of the raycast.
Line 32 is an if statement that will create a raycast from the ground plane created and the cameraRay. The rayLength variable stores the position x,y that the ray intersects with the plane.
Line 34 creates a 3D vector of the positions that the player should look towards.
Line 35 transforms the playerobject to look at the new point.
using System.Collections;
using System.Collections.Generic;
using UnityEngine;
using UnityEngine.InputSystem;

public class TwinStickPlayerManager : MonoBehaviour
{
    CharacterController _cc;
    Vector2 _movementInput;
    Vector2 _lookInput;
    bool isGamepad = false;

    // Start is called before the first frame update
    void Start()
    {
        _cc = GetComponent<CharacterController>();
    }

    // Update is called once per frame
    void Update()
    {
        Vector3 movement = new Vector3(_movementInput.x, 0, _movementInput.y);
        _cc.SimpleMove(movement);

        if(isGamepad) {
            Vector3 playerDirection = Vector3.right * _lookInput.x + Vector3.forward * _lookInput.y;
            transform.rotation = Quaternion.LookRotation(playerDirection, Vector3.up);
        } else {
            Ray cameraRay = Camera.main.ScreenPointToRay(_lookInput);
            Plane groundPlane = new Plane(Vector3.up, Vector3.zero);
            float rayLength;
            if (groundPlane.Raycast(cameraRay, out rayLength))
            {
                Vector3 pointToLook = cameraRay.GetPoint(rayLength);
                transform.LookAt(new Vector3(pointToLook.x, transform.position.y, pointToLook.z));
            }
        }
    }

    public void OnMove(InputValue iv)
    {
        _movementInput = iv.Get<Vector2>();
    }

    public void OnLook(InputValue iv)
    {
        _lookInput = iv.Get<Vector2>();
    }

    public void OnControlsChanged(PlayerInput pi) {
        if(pi.currentControlScheme.Equals("Gamepad")) {
            isGamepad = true;
        } else {
            isGamepad = false;
        }
    }
}
Save the file and test your code.